
Quick start
This walks you from an audio file to a sound playing in your scene. It takes a few minutes and no code.
1. Turn a clip into a Sample
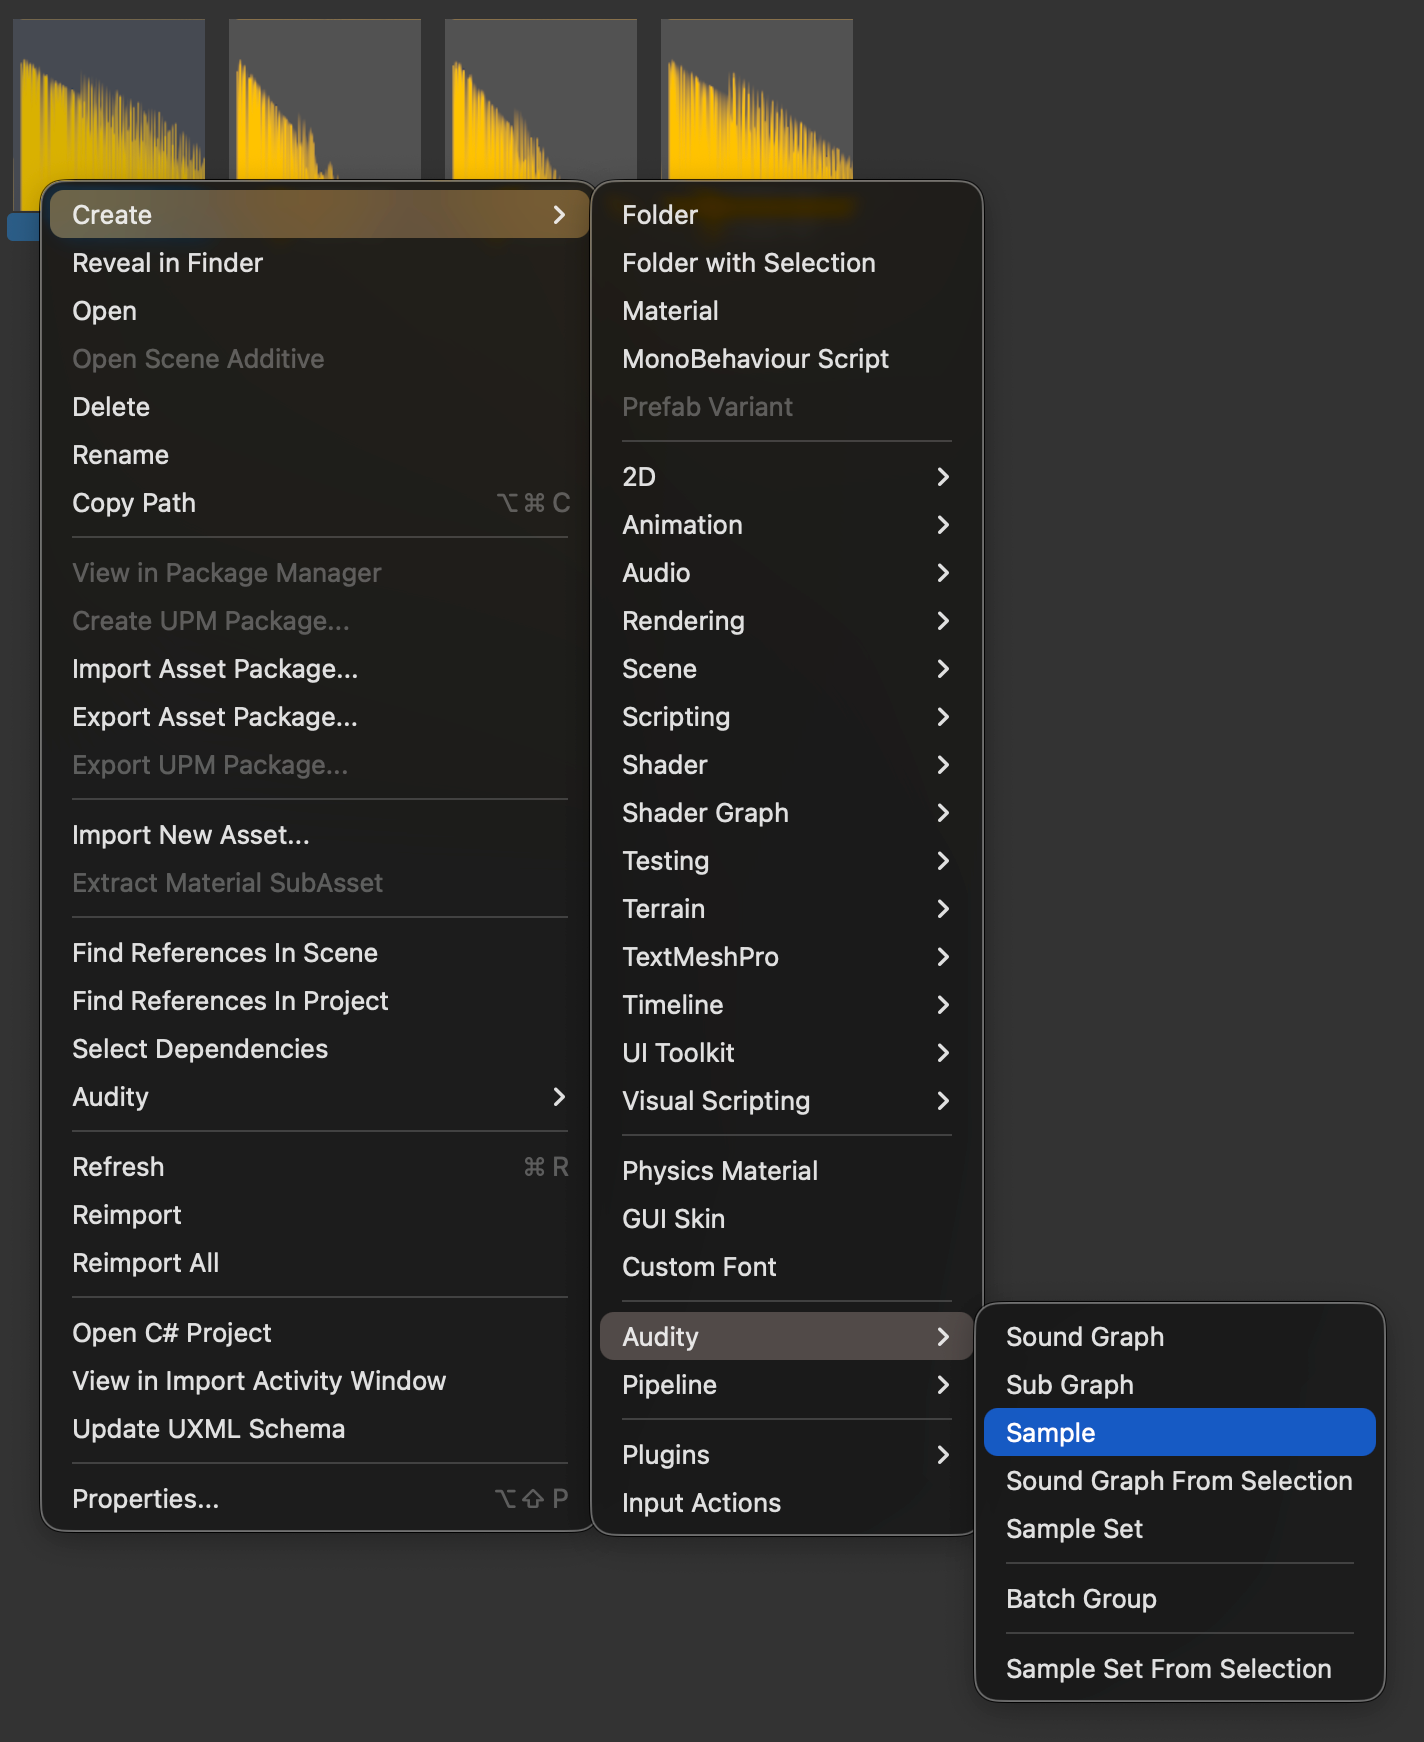
Section titled “1. Turn a clip into a Sample”Select an AudioClip in the Project window, then choose
Assets > Create > Audity > Sample. Audity creates one Sample asset next to
the clip, already pointing at it. (With nothing selected the same menu makes an
empty Sample you can assign a clip to later.)
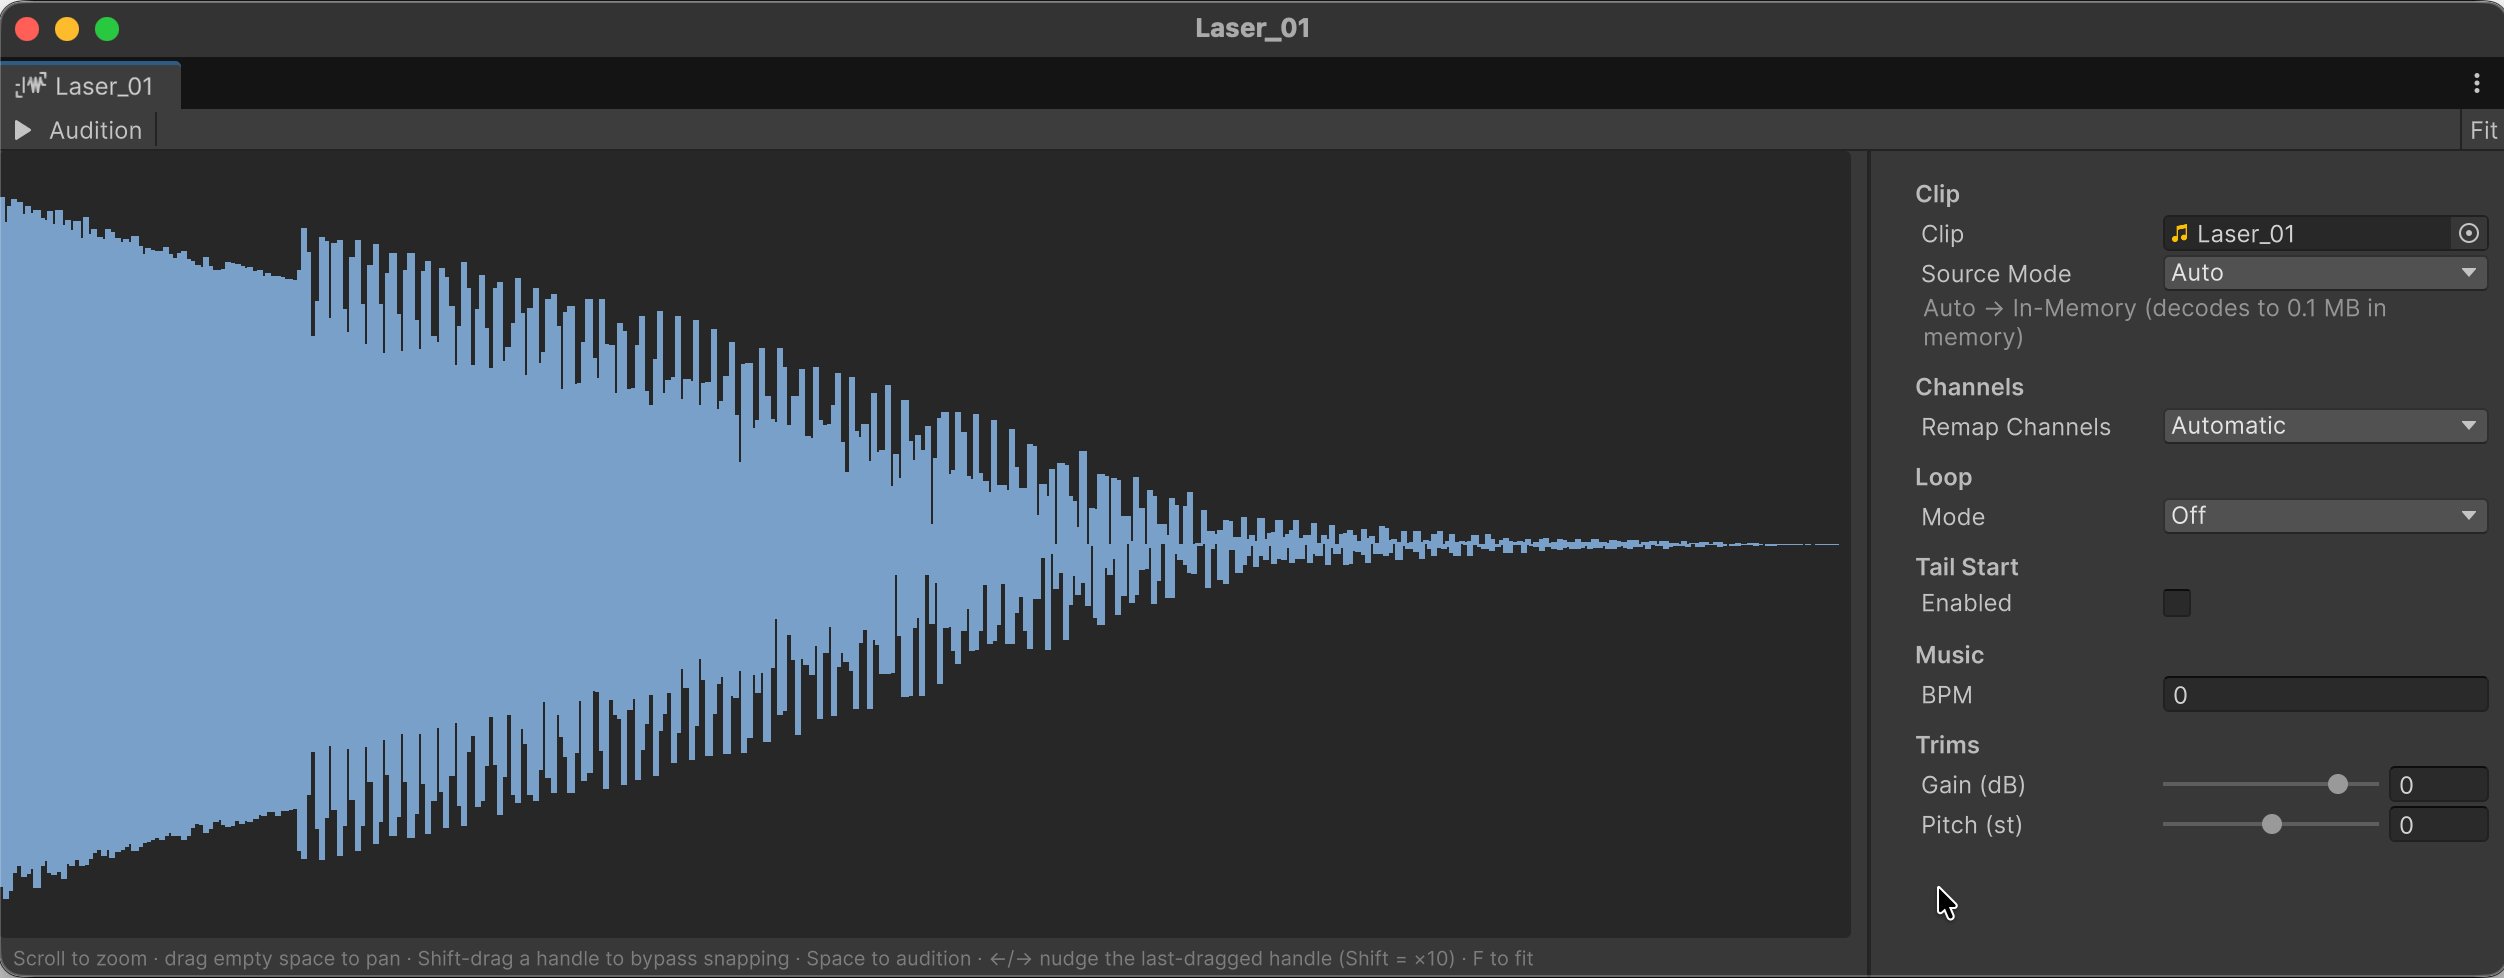
A Sample is the clip plus playback settings: loop points, a Tail Start, a source tier, and gain/pitch trims. You will tune those in Samples and sample sets; the defaults are fine for now.
2. Create a Sound Graph
Section titled “2. Create a Sound Graph”Choose Assets > Create > Audity > Sound Graph. The new graph opens with two nodes already placed: On Play (fires once when the sound starts) and Output (the graph’s speaker). The Output is mono; for a stereo clip, select it and set its Layout to Stereo (2).
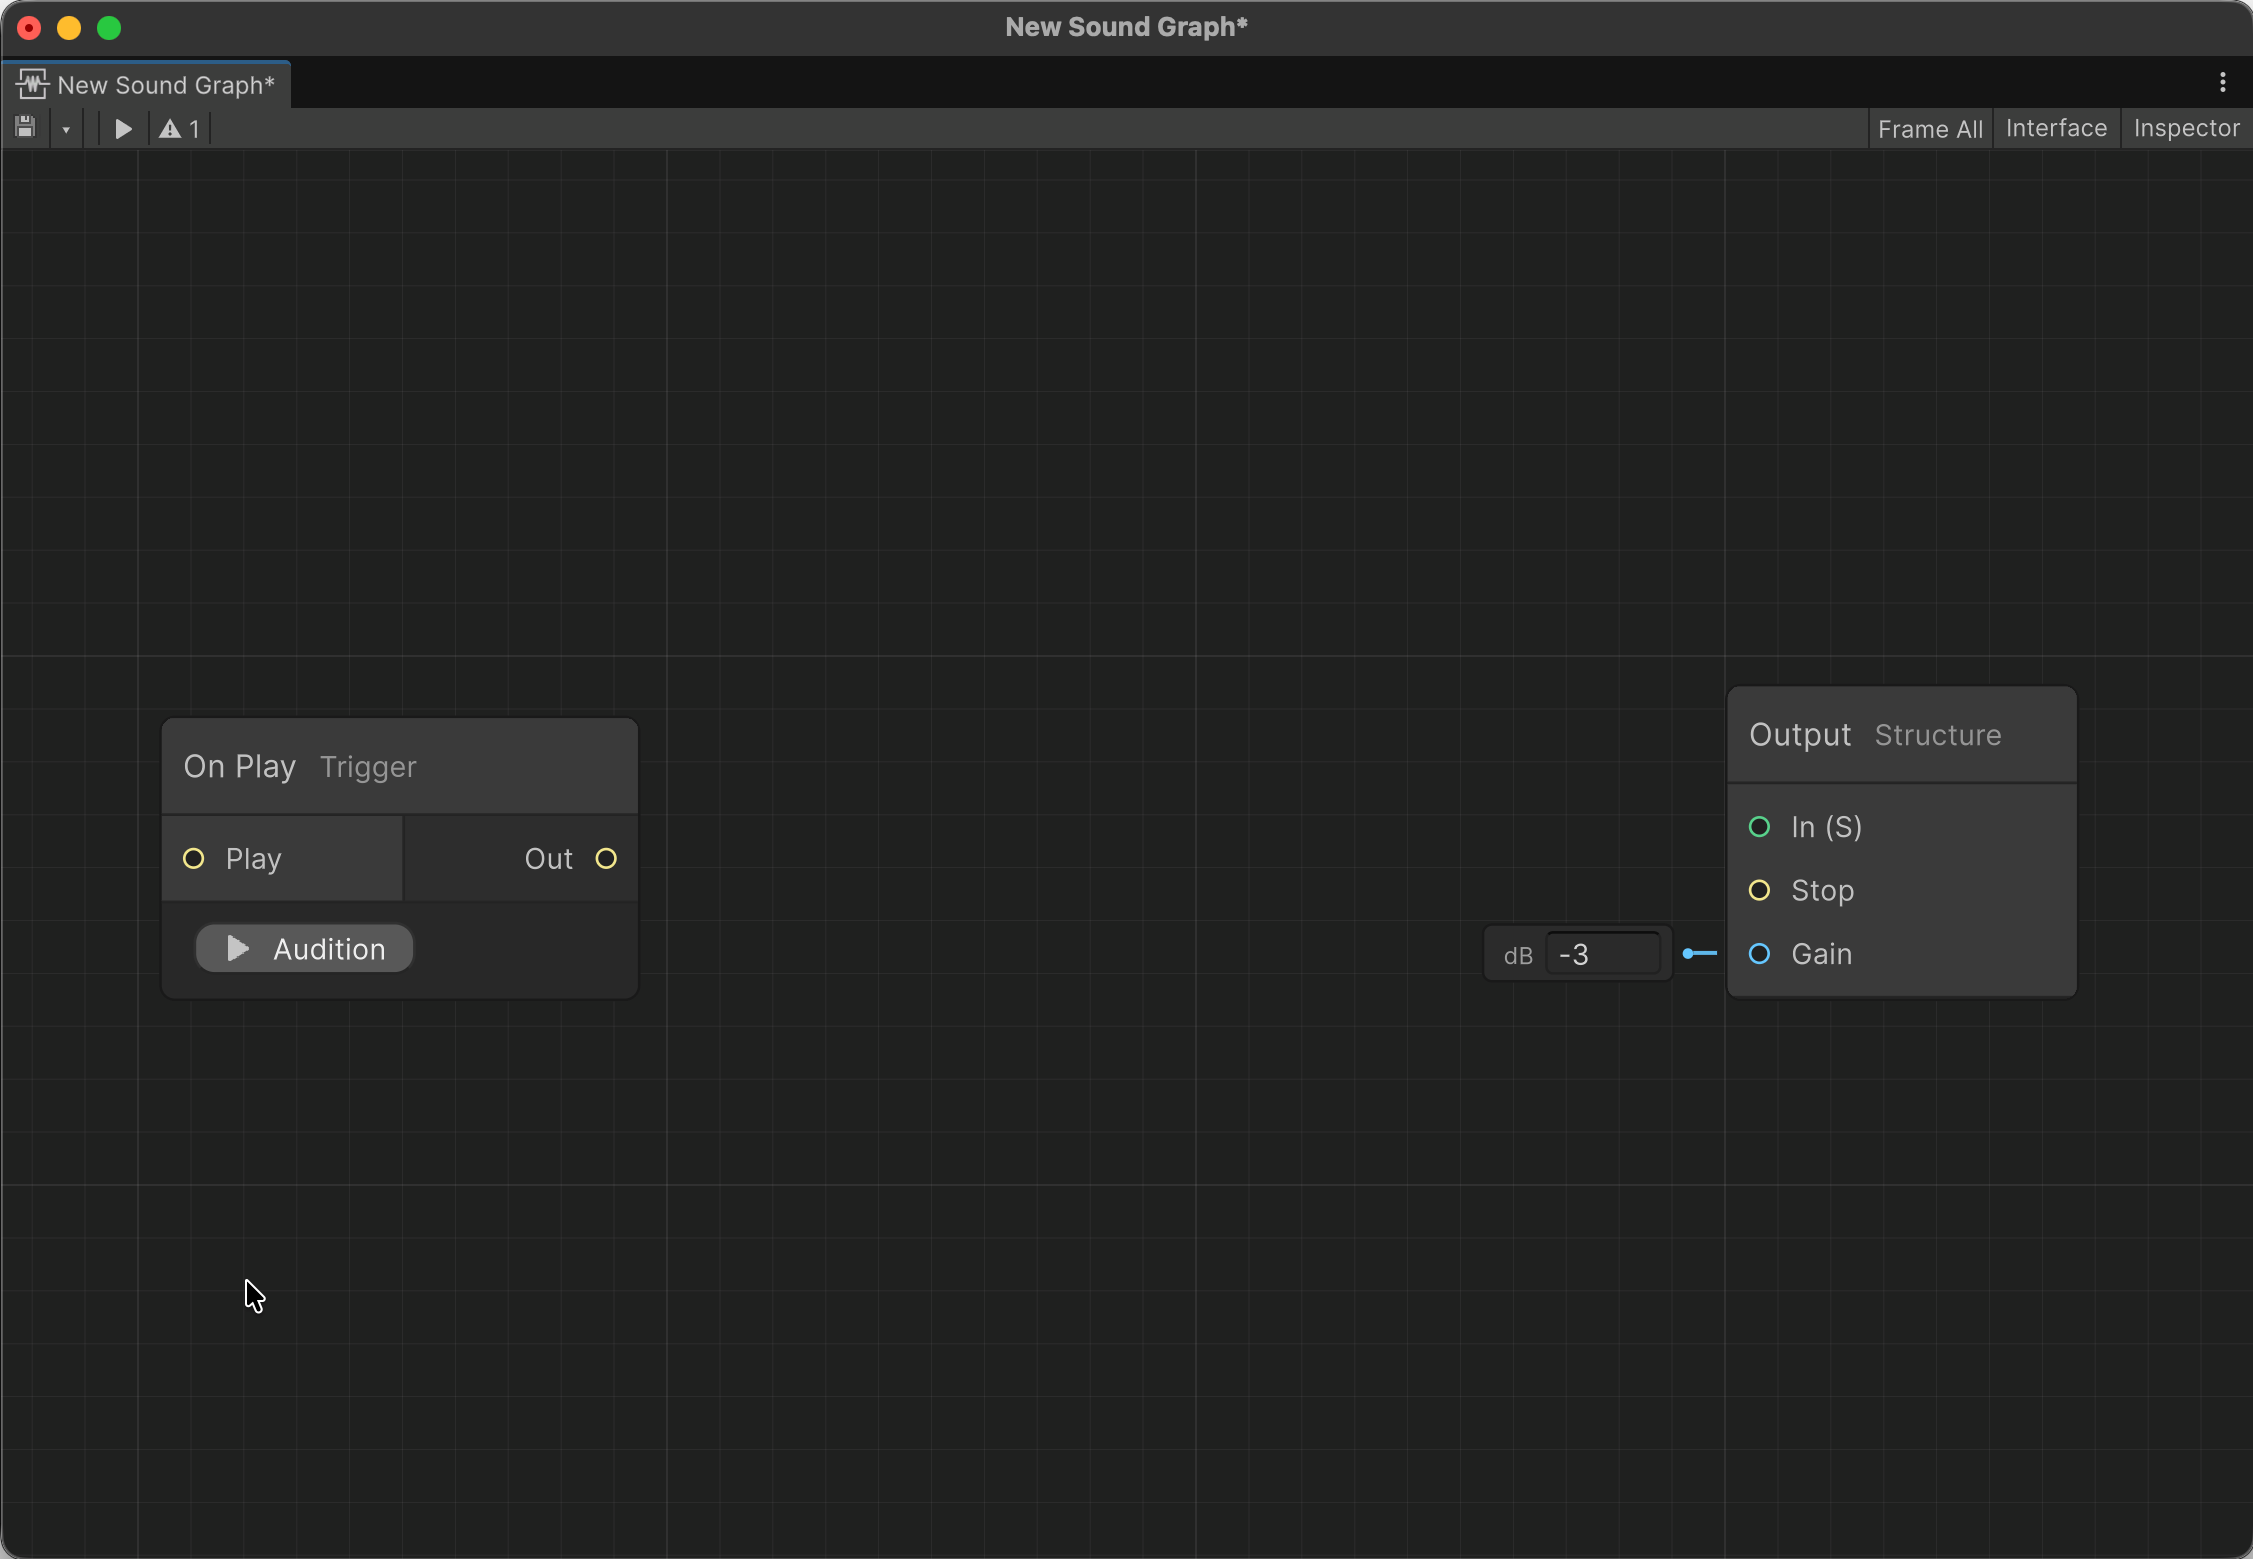
Double-click the graph asset any time to reopen its editor window.
3. Add a Wave Player
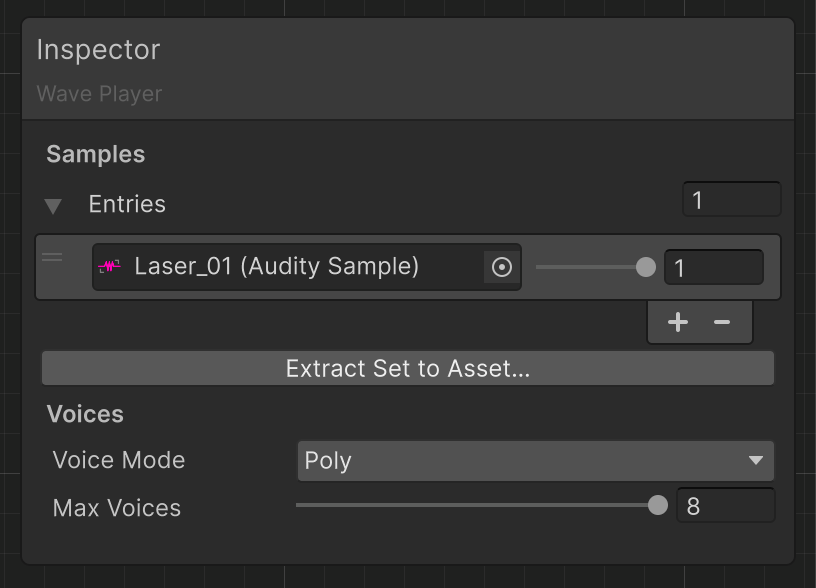
Section titled “3. Add a Wave Player”Open the create menu in the graph (right-click the canvas, or use the search) and add Sources > Wave Player. In the Wave Player’s inspector, add the Sample you made in step 1 as an entry under its Samples section.
4. Wire it up
Section titled “4. Wire it up”Now make two connections:
- Drag from On Play’s trigger output to the Wave Player’s Play input. This starts a voice when the sound begins.
- Drag from the Wave Player’s out (audio) output to Output’s in (audio) input.
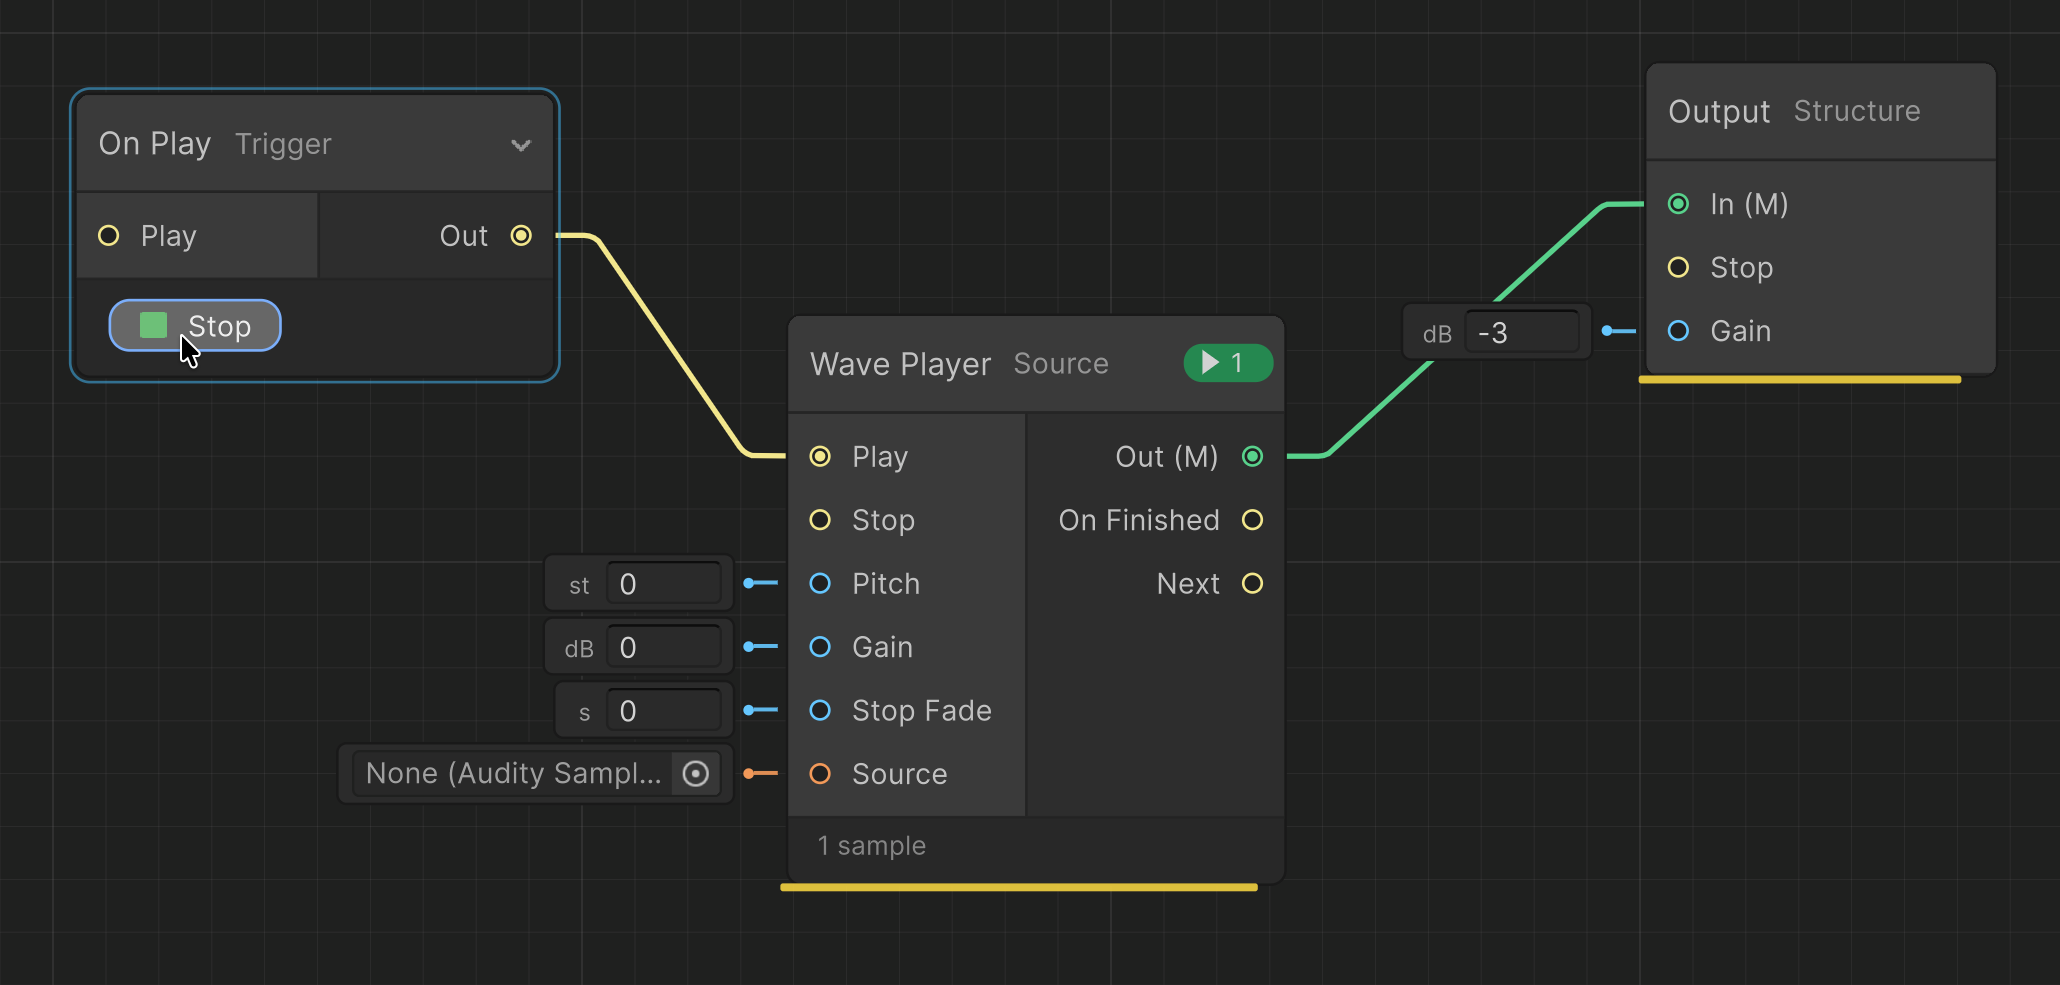
That is a complete sound: On Play starts the Wave Player, the Wave Player’s audio reaches the Output.
5. Hear it in the editor
Section titled “5. Hear it in the editor”Click Audition on the On Play node to hear the graph without entering Play mode, as in the shot above: the button becomes Stop and the Wave Player shows its live voice. The same button sits in the graph window’s toolbar as a play/stop toggle, and pressing either one again stops the audition. See The graph editor for the full audition workflow.
6. Play it from a scene
Section titled “6. Play it from a scene”Add an Audity Source component to a GameObject
(Add Component > Audio > Audity Source). It brings an AudioSource with it.
Assign your Sound Graph to the component’s Graph field.
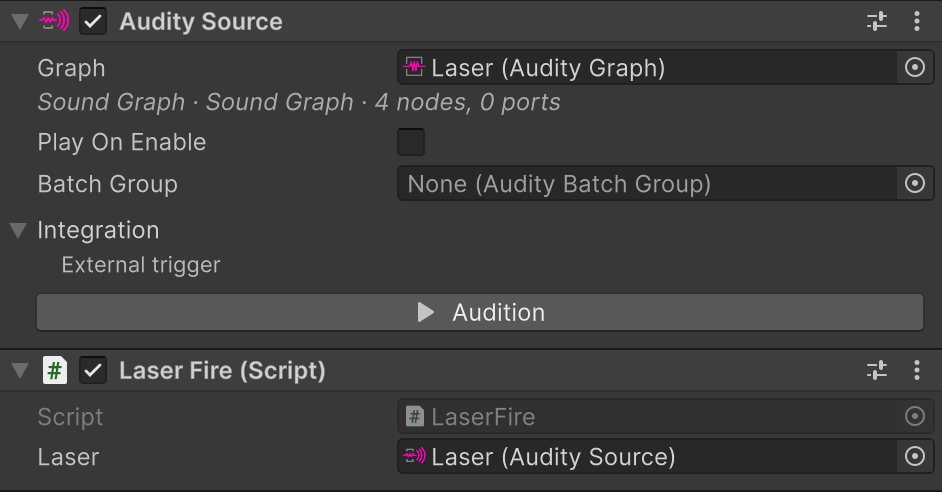
- To hear it the moment the object enables, tick Play On Enable.
- To play it from a script, call
Play()on the component:
GetComponent<AuditySource>().Play();Enter Play mode and the sound plays.
Where to go next
Section titled “Where to go next”- Make it less repetitive: put several clips in a Sample Set and let the Wave Player pick one per trigger.
- Give it a loop: drag loop handles in the Sample waveform editor.
- Drive it from gameplay: expose a parameter in the graph interface and set it from script.